


Build a Vape Coil in 7 Easy Steps!

In this guide for building vape coils, e-cig coils, DIY Coils, wire coils or whatever name you find most comfortable, every step will become familiar to you; so that you can begin your vape coil building journey, have fun, and save a lot of money along the way.
If at any point you want additional information, tips, tricks or you’re a total beginner, then you should read our article that gives you all the vital information for building vape coils. You’ll find all the tools, supplies and tutorials to get started in the Vape Coil Building Information Centre.
Index
- How to wrap Vape Coils from a Wire Spool
- How to install the Coil in your RDA or RTA
- How to test and optimize your Vape Coil
- How to fix uneven Vape Coil heating
- How to install Cotton in your RDA or RTA
- How to saturate the Wick
- How to work out what wattage to vape at
How to make Vape Coils
Ready to get building? When you’re working on your build deck or coil while it is plugged into a battery you should always be aware that it could be hot or electrically charged, so never touch it without the proper safety precautions, such as unplugging it or removing the batteries from the device.
As an example for the purposes of this vape coil building guide, we’ll aim for a coil with the following qualities:
- Single coil – 1 coil on the coil build deck
- 0.55Ω resistance – resistance of finished vape coil
- Kanthal – material of wire
- 3mm ID, macro coil – coil’s inner diameter is 3mm wide
- 6 full wraps – the coiled wire will have 6 ‘knuckles’ on the top side
To achieve this we’d use kanthal A1 24 gauge with a 3mm diameter, fully wrapping the wire around the coil jig six times, this will be slightly over our 0.55Ω target, but this is close enough.
You can learn more about these terms in the Vape Coil Building Information Centre.
If you are using a premade coil skip to ‘Step 2. Install the Coil in your RBA (RDA or RTA)’. The process for building with a premade wire coil is essentially the same as with a wire spool but premades will allow you to skip the first part of the process.
Step 1. How to wrap Vape Coils from a Wire Spool
To begin, cut a length of your chosen wire that will be easy for you to grasp, for beginners 30cm is more than enough and will allow for easy manipulation. Find your coil jig or wrapping tool and refer back to your target inner diameter, in our case it’s 3mm. There are two main options for tools for wrapping the wire into coils; Micro Coil Jigs or Guided Wrapping tools, we’ll explain each method below.
How to use a Micro Coil Jig
Items required:
- Kanthal wire (30cm will do).
- Micro Coil Jig.
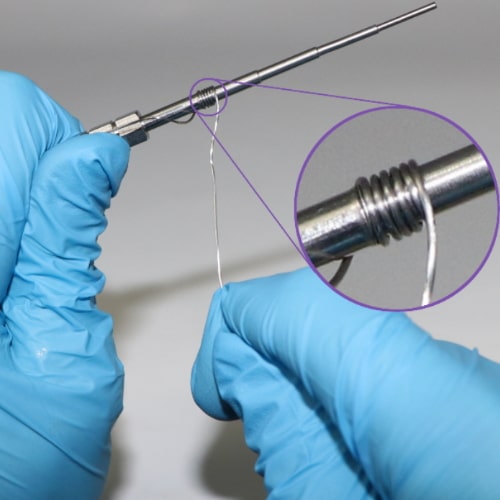
The first tool is using a Micro Coil Jig, which is essentially just a metal spike with gradually decreasing diameters for you to wrap around. If you want a 3mm inner diameter then wrap around the 3mm section as many times as your target calculations requires. Hold down your wire tight and parallel to the coil jig and begin turning the coil around the section you’ve chosen. Be sure that the coils are tightly wound and closely packed without gaps and not overlapping for an evenly heating coil.
Finishing the wrap should leave both of the legs of the coil pointing in the same direction, this is for installing it in your RDA, unless your device requires otherwise. Any screwdriver or drill bit that you know the diameter of could also be used to wrap.
After the wraps are wrapped,squeeze it all together, making sure there isn’t much space in between the wraps. This helps to ensure even heating.
How to use a Guided Wrapping Tool
Items required:
- Kanthal wire (30cm will do).
- A Guided Wrapping Tool.
Using a guided wrapping tool such as the ‘Coil Master V4 Coiling Kit Jig’ will wrap your vape coils perfectly using a purely mechanical process. Simply set your inner diameter, slide your wire into the device and turn it for however many wraps you want, in my case this is seven wraps. This can make wrapping much easier and more accurate than using a manual coil jig.
There are more methods, using drill bits and such, but for this beginner’s guide you don’t need to worry about that.
Step 2. Install the Coil in your RBA (RDA or RTA).
Items required:
- An RDA such as the Vandyvape 24 Pulse BF RDA or an RTA such as the Geekvape Zeus X RTA Tank.
- Nail or Wire clippers
- A Tool that can tighten the clamps/screws on your RDA/RTA.
Now clip the legs, if not done already, that will be poking through the post hole at the previously calculated length, or whatever will be easier to work with that will not be so long that it can’t fit in the RDA.
Safety is very important, as such, it’s always safer to work on the RDA/RTA when it is not installed on any device that could conceivably give power. Always make sure there is no power going through anything when working on it. If you’re have the RDA/RTA installed on your device when working on it then you must be 100% certain that it is safe to do so. Take the batteries out, ground yourself, if you need to poke around then only use ceramic tipped tweezers or other non-conductive materials, don’t be forceful, keep yourself away from the fire button.
Different devices utilize different mechanisms for installing a coil. Some have screw-in bolts that clamp down on the coil legs, which require either a Phillips head or flat head screwdriver, or possibly an allen key. Open the screws so the two legs of the coil can be threaded through the posts (one leg in each post) and then tighten it down. The coil should be held just tightly enough so that it is totally secure without breaking the legs by force. If your RDA/RTA doesn’t have legs that poke out after installation then you need to clip the legs to a length that fits before hand.
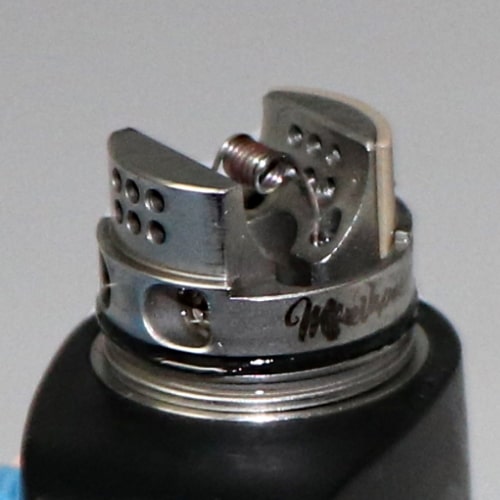
Now that it is secure, make sure the legs aren’t poking out much, shorten the legs by twisting them around, if not done already, make them come out from the post holes as little as you can. It’s necessary to make sure that the coil or coil legs don’t touch the chimney when it’s screwed down to the base as it will short the atomizer. Adjust the coil so it sits level horizontally.
Step 3. Test your Vape Coil
Items required:
- An Ecig Mod that can read ohms, or An Ohm reader
The hard part is over, now to test the vape coil. The coil has been successfully installed in the RDA or RTA’s build deck. Hook up the RDA/RTA to your ohm meter or device that can read ohms. Make sure the resistance number (ohms) isn’t something wildly different to your predictions as this may tell you if something is wrong. If the result is plus or minus 0.40Ω of what is expected then check the calculations again and possibly even start again if trying to fix any imperfections fails.
Step 4. Fixing uneven Vape Coil heating
Items required:
At this stage of the process you can power the device, which will heat up the coil. If you’ve done this and it heats up evenly across the coil then you’re in the clear and don’t need to adjust it any further. However, if you find yourself wondering “why is my coil not glowing evenly?” then there are 3 main methods of attack for this issue:
- Straightening
- Strumming
- Squeezing
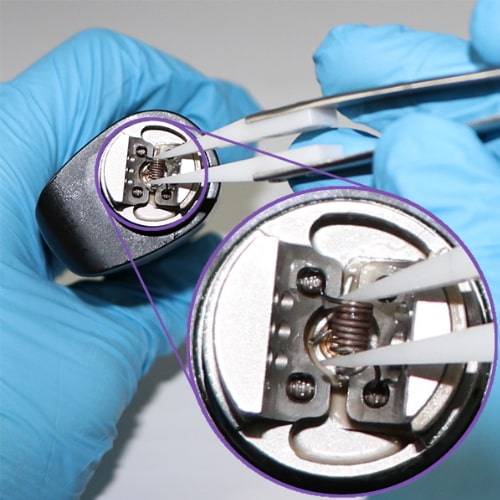
Straightening: If your coil is wonky or not totally horizontal, or neatly placed on the build deck, then it may read the wrong resistance or unevenly heat up. Make sure there is no power going to the device, by unplugging it and grounding yourself. Use a solid & non-conductive tool, such as the ceramic tips on your tweezers, to poke through the centre hole. Now you can manoeuvre the vape coil to be neat and horizontal, just make sure the legs are not under too much strain or they make snap.
Strumming: Simply strumming the coils can work wonders, running your ceramic tipped tweezers along the outside, ridged walls of the coil. As if your running your finger across a piano. But why does strumming coils work? It helps to ever so slightly space out the coil wraps from one another. When they are all absolutely crammed together then sometimes it can have a very slight shock, which disrupts the flow of power.
Squeezing: With your ceramic tipped tweezers, repeatedly and firmly squeeze the coil horizontally until it looks compact, and neat. Squeezing will bring everything closer together and help even out any imperfections. Ceramic tweezers are important because they will not conduct electricity and greatly reduced heat conductivity compared to any typical metal that regular tweezers are made of. Remember to keep checking the resistance after adjusting.
Step 5. Thread cotton into your Vape Coil
Items required:
- Processed, Unbleached, Organic Cotton (only 1 small section of a pad is necessary).
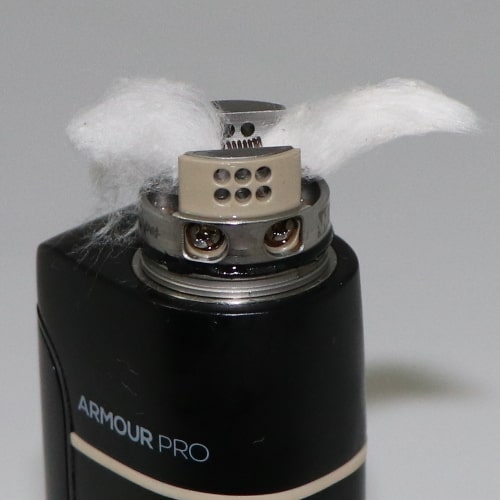
After the coil has been adjusted we can install our cotton. Cut a small strip of your unbleached, organic cotton to fit through the coil and fill the juice well. Making sure not to drag your coil harshly or move it too far out of its position, which could break it. There should be a slight very physical resistance from the coil when pulling the cotton through though. This is so you know the cotton is compact, but not too compact inside the coil.
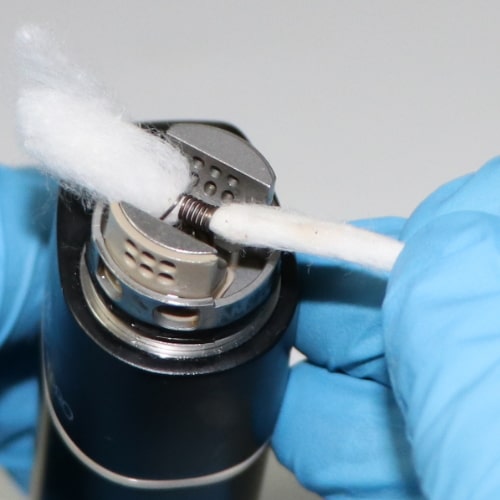
If there is too much cotton flowing over the edges, which there almost always is, cut the excess off with scissors or your trusty nail clippers. Make sure the outside of the coil is not smothered by cotton; leave enough air space around it and at least 1mm below it for proper air flow, and keep space above the vape coil clear. Fluff up the cotton by gently pulling strands apart while it remains in one piece. Cotton that is too tightly packed will not absorb e-liquid well and could result in a burnt flavour if you’re vaping often, because the cotton cannot soak up the e-liquid fast enough.
Step 6. How to best saturate your wick
Items required:
- E-Liquid. Prefferably 60VG/40PG or higher VG
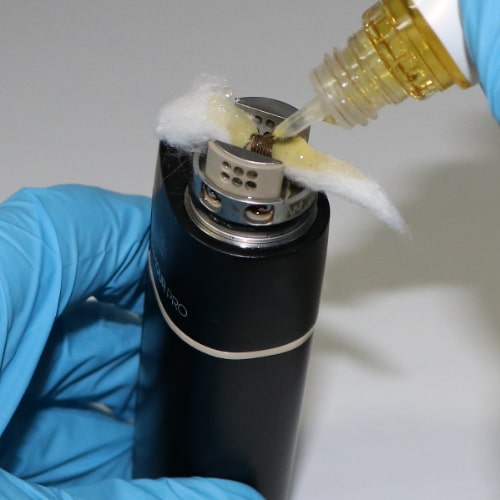
The cotton is now known as the wick, it wicks up the e-liquid. Saturating is when you soak your cotton wick in e-liquid, dripping it all over your vape coil and cotton so that it is all well saturated but doesn’t leak out of the device. Drip liquid all over the surface area of the cotton and allow the juice to seep in deep. Finally tuck all the cotton in neatly so it’s not hanging over the edges.
Step 7. Work out what wattage to vape at
Forsafety purposes, if you’re not familiar with ohms law, power and voltage, you should read the full explanation in our Vape Coil Building Information Centre. The “What is Ohms law, Power and Voltage?” section covers these topics in great detail.
3.7 volts is usually about right for resistances above 0.3 ohms. Therefore this is a good starting place for estimating how many watts you will need. So assuming 3.7 volts is our sweet spot, we should calculate how many watts it takes to get 3.7 volts from our vape coil. For example, if you make a 0.5ohm coil and want to figure out how many watts it takes to get to 3.7 volts, we will calculate watts by using the equation:
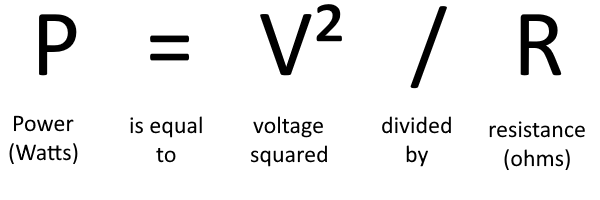
Always start by firing at least 20% lower watts than your calculated value, in our case that would be 10.53 – 20% (10.53*0.8), which equals 8.24. This gives the coil and cotton a small period to acclimatize to the job. Gradually work your way up by incrementally increasing the wattage every couple of draws, up to your goal wattage. Stay there or increase until you find the perfect power for you, and once you find it, you’re done! Remember to keep your cotton saturated with E-liquid while you’re testing, it’s easy to forget.
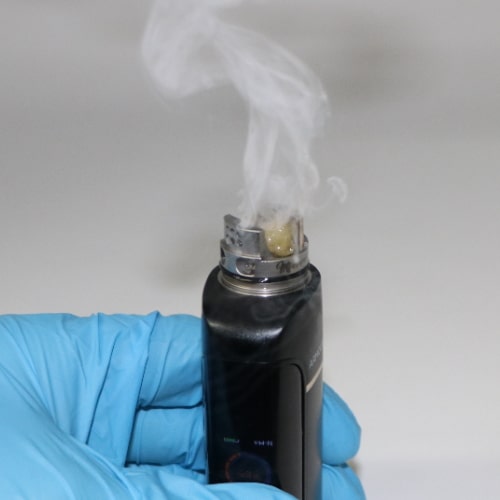
At long last, the operation is complete! And you are ready to begin vaping your very own homemade e-cig coil! Congratulations!
Thank you for reading the beginner’s Vape Coil Building Guide! I hope you have as much fun building coils as we did building this guide! You can find more excellent articles just like this in our guide section, to further incrementally improve your knowledge and have lots of fun along the way. We also run a Facebook group, The Vapable Vapers Group. This is for you to swap ideas about recipes, mixing, and general vaping, or anything else with other like-minded mixers and Vapers that have the same interests as yourself.
